Quick start guide
Prerequisites
You will need Python 3.5 or above, and Django 2.2 or above.
Note
If you’re on an older version of Django you can pin to version 1.3.0. Note that 1.3.0 is unmaintained, and you should upgrade to Django 2.2 for continued support.
Installation
To install cg-django-uaa, run:
pip install cg-django-uaa
Required settings
Begin by adding the following setting to your Django settings file:
UAA_CLIENT_IDThis is your app’s client ID for cloud.gov UAA.
UAA_CLIENT_SECRETThis is your app’s client secret for cloud.gov UAA.
UAA_AUTH_URLThis is the URL for the authorize endpoint for cloud.gov, e.g.
https://login.fr.cloud.gov/oauth/authorize.UAA_TOKEN_URLThis is the URL for the token endpoint for cloud.gov, e.g.
https://uaa.fr.cloud.gov/oauth/token. Note that it may be at an entirely different domain from the authorize endpoint.
For information about getting a client ID and secret, see the cloud.gov docs.
Also make sure you add 'uaa_client.authentication.UaaBackend' to
your AUTHENTICATION_BACKENDS setting.
Important
The default authentication backend will only allow users with existing
models in your database to log in, which means that you’ll probably
need to manually create users through Django’s admin UI or via
manage.py createsuperuser.
To override this default behavior, you can set UAA_APPROVED_DOMAINS to
create users for specific email domains. For more advanced cases, you may
subclass uaa_client.authentication.UaaBackend.
You will likely want to set LOGIN_URL to 'uaa_client:login', so
that any views which require login will automatically be redirected
to cloud.gov-based login.
You’ll also need to have django.contrib.auth and uaa_client in your
INSTALLED_APPS setting.
Finally, you will also need to add
uaa_client.middleware.UaaRefreshMiddleware to your MIDDLEWARE
setting (or MIDDLEWARE_CLASSES if you’re on Django 1.8 or 1.9). It needs
to be placed after Django’s session and authentication
middleware, e.g.:
MIDDLEWARE = [
    # ...
    'django.contrib.sessions.middleware.SessionMiddleware',
    'django.contrib.auth.middleware.AuthenticationMiddleware',
    'uaa_client.middleware.UaaRefreshMiddleware',
    # ...
]
Optional settings
By default, users must be created manually before they can authenticate. If you’d like, you can approve certain domains to create users if they do not already exist:
UAA_APPROVED_DOMAINSThis is an array of domains for which all emails should be able to log in to the site. If a user authenticates from one of the domains but a user account doesn’t exist, the backend will create one and log the new user in.
Setting up URLs
You will want to add the following to your Django project’s URLconf.
from django.conf.urls import include, url

urlpatterns = [
    # Other URL patterns ...
    url(r'^auth/', include('uaa_client.urls')),
    # More URL patterns ...
]
If you are using Django 1.8, you will need to additionally pass a
namespace="uaa_client" keyword argument to include().
Fixing admin login
If you’re using Django’s admin UI, you’ll also want to configure it to
delegate to UAA instead of asking the user for their username and
password. This can most easily be done by using the
uaa_client.decorators.staff_login_required() decorator in your
URLconf:
from django.contrib import admin

from uaa_client.decorators import staff_login_required

# Wrap the admin site login with our staff_login_required decorator,
# which will raise a PermissionDenied exception if a logged-in, but
# non-staff user attempts to access the login page.
admin.site.login = staff_login_required(admin.site.login)

urlpatterns = [
    # Other URL patterns ...
    url(r'^admin/', include(admin.site.urls)),
    # More URL patterns ...
]
Required templates
You will also need to create at least one template to use cg-django-uaa.
All of these are rendered using a RequestContext and so will also
receive any additional variables provided by context processors.
uaa_client/login_error.html
Used to show that the user has encountered some sort of error
when trying to authenticate with cloud.gov, or when trying to associate
a cloud.gov user with a Django user. The context contains
a single variable, error_code, which can have a variety of
string values, including:
'authenticate_failed'This means that the underlying call to
django.contrib.auth.authenticate()returnedNoneinstead of a user. The actual reasons for the failure depend on theuaa_client.authentication.UaaBackendyour project is configured to use; it could mean, for instance, that the OAuth2 code passed back from the cloud.gov’s authorize endpoint was invalid, or there exists no user model with an email address corresponding to the user who just logged in via cloud.gov.You may learn more about why authentication failed by enabling logging output for the
uaa_clientlogger at theINFOlevel. While configuring logging is outside of the scope of this guide, you may refer to the example project’s settings for an example.
The other error codes generally refer to mishaps in the OAuth2 protocol
and can be discovered by examining the uaa_client.views module.
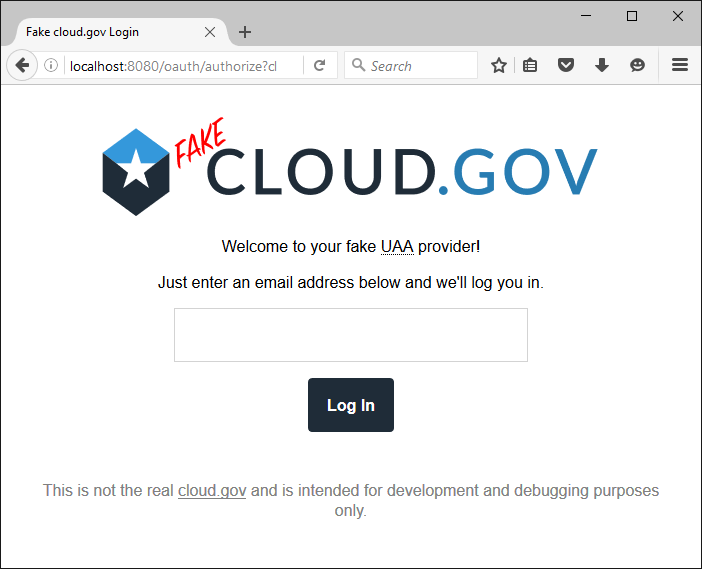
Using the fake cloud.gov server
It is possible to use a fake UAA provider for development purposes. This allows developers to simply enter any email address and automatically be logged-in as that user.
To enable this functionality, set the UAA_AUTH_URL and
UAA_TOKEN_URL settings to 'fake:'.
As this feature would clearly be a security hazard if used in
production, it is only available when DEBUG is True.
Note also that the fake server won’t work properly if the web
server hosting your Django project can’t handle more than one
request at a time. This generally shouldn’t be a problem, since
manage.py runserver doesn’t have this limitation. If you’re using
gunicorn to serve your app in DEBUG mode, though, you may want to
make sure that your WEB_CONCURRENCY environment variable is
set to a value greater than 1.